

Halloween is just around the corner, and I can’t help but remember the bucketfuls of candy my sister and I used to gather after Trick or Treat. Who said you can’t have candy (and personalized ones at that) on your wedding?
I have always been fond of Chocnut, a local candy distributed here in the Philippines. It has a flavor of peanuts and chocolate at the same time. I just really like it, so much so that I named one of my favorite dogs, Choknat!
Anyway, during the course of our planning, I thought of giving away personalized Chocnuts to our guests. Marc liked the idea, but it came up a little bit too late—just a month before our wedding day. We didn’t have enough time to create these little yummy giveaways.
Since it’s a local candy, Chocnut comes in packs that are pretty cheap. You can get raw materials for decorating it in Divisoria (again, materials there are very cheap). The cost for these personalized candies isn’t a problem—it’s personalizing them that would take up most of your time. But if you aren’t busy, and still months away from your wedding, you can give this idea a try.
What you’ll need:
- Chocnut candy
- Regular bond paper (or shiny specialty paper if you want to go fancy, but avoid using the scented ones)
- Sinamay cloth
- Satin ribbon
- Glue
- Cutter
- Scissors
- Ruler
- Disposable paint brush
- Color printer
- Graphic-editing software (ex. Photoshop or PaintShop Pro)
Here’s what you need to do:
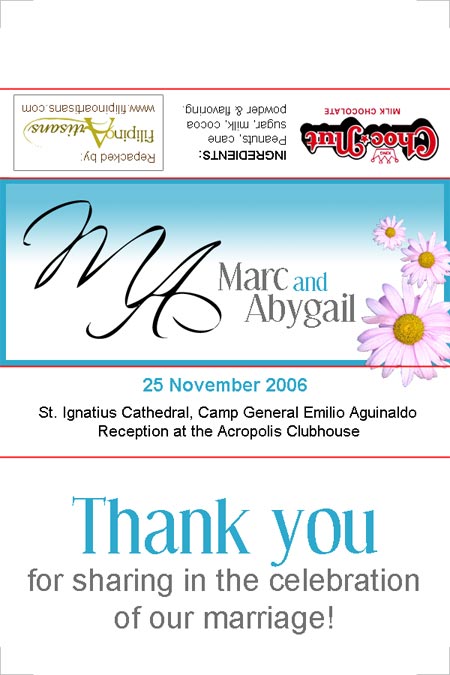
Create the design you want using a graphics-editing software. Make sure that your print area for each of the labels is 2” x 3” inches. On the image below, the red marks indicate the folds of the label when you stick it on the candy’s silver cover. (Once I upgrade this site’s hosting, I’ll provide a link to my Photoshop template file download The Photoshop template file is now available at the Downloads page). Make sure that you put in tiny light gray marks on the edges of the document so you’ll know where to cut.
Once you’re done, lay out the labels on a 7.5” x 9” inches graphic canvass. That way, when you print, you won’t waste paper and maximize the entire page. Print it out and leave the sheet to dry. Cut the labels carefully using a sharp cutter and a ruler.
Remove the labels on the Chocnut candies, but leave the silver cover on (the candy will break apart if you don’t). Put the labels you just made around it and seal with a bit of glue using a disposal paint brush (the bristles tend to harden if you don’t clean it properly afterwards, so it’s best to just get a disposable, cheap one). Don’t put too much glue, or you’ll smear the print.
When you finish labeling, cut a small piece of Sinamay and put a few candies in the middle. Take the four sides of the cloth and bring them up on top of the candies so they will be covered. With one hand holding the make-shift bag, tie it up with a satin ribbon. You’re done!
Chocnut isn’t the only candy you can personalize. Personalize any candy bar you want, just make sure you don’t remove the inner cover—glue on candy isn’t healthy 😛 You can even put tags and jazz up the candy bag as you see fit. Let your creativity run wild!